Wednesday, September 29, 2010

Baby It's Hot in There!


There are lots of videos on line about compost but this article gives a simple recipe if you want to spend a few hours making "Hot" compost this fall to take advantage of all the veggie greens you are pulling out. This hot compost recipe allows you to build a pile that is ready in a hurry. No need to replace your existing pile(s) - this is something extra - a fast pile to get the extra stuff in the garden fired up and disintegrated in a hurry. Estimates say you can build and finish a fast compost in just over a month. It will heat up right away and with turning it will be ready before Halloween.

1- Day 1. Gather fresh green materials. I asked my local landscaper to drop off other people's grass clippings- he left about 2 yards of stuff on a tarp last friday. He says he has not sprayed herbicides on these lawns - they have only been fertilized. I also stopped by a local riding stable and grabbed a feedbag full of really fresh horse manure. Manures are real fire starters and I really wanted to get this pile going fast.

2- gather brown materials such as old weeds, piles of things that are dry and not decomposing and fine wood shavings if available. I always have plenty of these things laying about and since I am planning a hot pile I am not worried about weed seeds. The seeds and any pathogens should be wiped out in the heat.

3 - start piling materials in about 6 cm or 3 inch layers beginning with a stack of dry stuff followed by a stack of green. You are trying to get equal amounts of dry and green (carbon and nitrogen) stuff but remember a wood shaving has 1:200 nitrogen to carbon while grass clippings have 20:1 nitrogen to carbon. You need equal amounts of carbon and nitrogen in the end so you have to guess how much of each item to add. I err on the side of adding too much nitrogen.

4 - make the pile large or at least a cubic meter in size so that once it gets hot it will be big enough to hold the heat, I try to make the base wider than a meter so that the inevitable sloping sides will leave it at least a meter wide and high.

5- water the pile so that it is damp - not soaking sopping wet but damp throughout. If it threatens rain cover the top with a tarp. I leave the sides open for airflow.

6- hope for the best. You want 55-70 degrees C within a few days. And you want to maintain this for about three days. I have a thermometer I bought at Lee Valley Tools and it only reads in F but my husband translated for me.

7- Day 2-3. Results have been fabulous. On the first morning I had 140 F already. This is about 60 C so it is right on the money. So far it has been three days and the pile is still smoking hot. Exciting stuff for a gardener. If it was to get hotter I would water it or turn it because over 70 C and the stuff won't be composting properly. I have not had that problem yet. Like an emergency room nurse I keep slipping outside, checking the temperature of my patient several times a day.

8- Day four - the pile has been hot for three full days. After three days at this temperature the weed seeds and most of the pathogens are toast but the outside of the pile didn't get that hot. It is time to turn it. It is heavy so I have asked for help. Thank-you dear husband. This is essentially why I don't do this often. I have a turning composter for making the most of my greens and browns. But because the turning unit is only four cubic feet it is not big enough to sustain a high temperature. When I am doing really well it is heating up around 90 degrees F. This is only in the 30's C.

9. Success- the turned pile is back in the "pile" shape and is about 1 meter tall and wide. After turning it to incorporate the fresh looking stuff on the outside into the center of the pile I take the temperature again. It is now 100 C - which is considered in the Steady zone. I might add a bit more water and put the tarp back on to hold in the heat because I want to get it back up to 140 degrees again for another three days.

10 Day 5 - the temperature is back up to 140 F. I have not watered it but it may be getting dry so I will be keeping an eye on it. I wish I had added phosphorus to tie up the nitrogen. Rock phosphate is the best choice here, I usually add rock dust too but was in a hurry and forgot that little detail. Okay in two more days the pile can be turned one final time and then left on it's own to finish.

11. Meanwhile I have started a separate leaf pile with 1/2" hardware wire - 3' tall. It is not tied together. The leaves are holding the shape. I am only going to make leaf mold so am not adding anything to the pile to make it hot- not yet anyway.

12. Day 6 - wow! Second day since turning and temperature has shot right up to 150 F this morning - good thing I didn't water it. If it gets any hotter I may need to water to cool it down. According to my estimates it needs another full day at this temperature and then we'll turn it one last time and leave it. Its cool to be hot.

Friday, September 24, 2010

Leather-end on Tomatoes?


Leslie from Sherwood park called into CBC radio asking about her leather-end problem on tomatoes. I should have asked her to describe the problem more but she seemed to know what she had. Further research at this end shows the term leather-end is rarely used. The problem is more commonly called blossom-end rot. This is a problem I have a lot of experience with. The end opposite the stem-end has a blackening and thickening of tissue. The problem is caused by a lack of calcium in maturing fruits.

The problem Leslie may be having could be more related to how she fertilizes or to the cold season we have had. In cases where nitrogen fertilizer use is too high the problem with blossom-end rot is higher because the fruits are growing too fast and not able to utilize or absorb calcium fast enough. Many fertilizers made especially for tomatoes include extra calcium for this very reason. If the main fertilizers she uses are not for tomatoes I suggest cutting back drastically on them and improving the soil with organic matter. This becomes a slow-release fertilizer for plants and eliminates the need for a lot of other commercial fertilizers.

The other reason Calcium is sometimes short is because there is an erratic amount of moisture. These fluctuations can mean the level of Calcium varies and - again- the plant expresses itself with symptoms described by blossom-end rot. Keeping the beds evenly moist is the answer and again, organic matter in the soil helps to hold moisture and provide it to plants on a more even basis.

If Leslie was growing in the same soil every year the temptation is to fertilize heavily but the solution is really to use more organic materials and to fertilize slowly and with complete fertilizers that will give plants what they need slowly and gradually. It seems simplistic but adding organic matter to the soil really helps avert many problems.

Wednesday, September 22, 2010

Fall Tune-up- Get your soils in shape


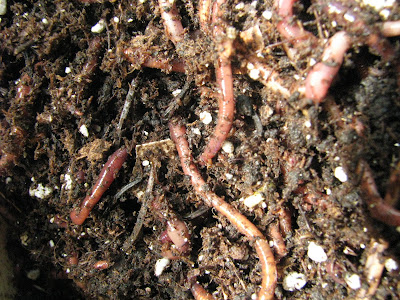
It's like yogurt for your soil. A handful of worm castings adds biology to tired soil. This in turn makes the soils soft as the microbes work over winter to extract nutrients from the plant materials left behind by the summer garden. Microbes also work to incorporate the nutrients clinging to clay into the root zone or rhizospere. We eat Bran and soils eat their own version of roughage - coarse leaves feed fungi and chopped leaves feed bacteria. The choice is yours as you start to think of ways to fix soil going into the dormant season.

I have been making worm castings for years but this fall I bought two kinds of castings to add to my soil because I wanted to have a look at a couple of commercial kinds of worm castings under the microscope and in the garden. I also wanted to supplement what I have in my own worm bin.

First things first. Lawns need an equal amount of bacteria and fungus so I added castings to the lawn. I figured this extra biology would break down any dead or dying lawn debris or thatch. In turn, this will provide a spring flush of nitrogen that lawns need.

Next I added worm castings to my garden beds... just a light top-dress.... a scattering really. This will add to the microbes already present and make for some great soil come spring. My own worm castings are not available in 50 liter bags yet but I do use what I have. I mix mine with the compost I am making and that will be ready soon to dump out and spread on the garden. My yard is going to have so much biology it's a scary thought.

If you think you have added plenty of compost in the past think again... gardens go through an amazing amount and it keeps breaking down and being used by the plants. We also continue to remove clippings and produce so that has to be replaced. Unless you have dream soil that can allow your hand to plunge into it up to your wrist you need organic matter and biology. This is the ideal fall task and if you don't have any buy it!

Sunday, September 19, 2010

Planting Garlic Bulbils


Last year I suggested removing the garlic scapes - or little flower-like stalks that emerge from the top of garlic midsummer. This was to ensure the garlic a fighting chance and allow all the energy to go to building bigger bulbs during the summer. This year I was away when the scapes first appeared and then forgot to remove them altogether. When I returned to my garden mid-summer these little bulbils- or bulbs on a stick- were well developed. I was unsure what to do with these green sprouted miniature bulblets also called bulbils. The sprouts were pushing out of the papery shell covering them. If I pulled these fragile sprouting bulbils apart would I damage them? I decided to clip off these clumps of miniature bulbs and since I was in a rush I tossed them on the garden and abandoned them there.

Genetically bulbils are identical to root bulbs but much smaller. I took a sort of passive approach- I admit- but what could I do? I felt a bit guilty tossing them on the soil surface - thinking I would get back to them later - but else would nature have done? In the month that passed before I got back to them the little green sprouts shriveled and dried but the bulbils seem to have grown - and they look as healthy as ever. I forgot I had planted a few - as an experiment- and when I dug them - again by accident- I noticed they had started growing little roots.

That's it- time to plant these bonus bulbs now. Getting to work on it this morning I realized the bulbils break the normal rule of bulb planting. With tulips the rule is pointy side up. Suddenly I had to dig up the sprouting bulbils I had planted because I realized they are actually rooting on the narrow end. The larger round end needs to go up and the narrow end goes pointy side down into the ground. Okay I have been gardening for thirty years. I shouldn't still be learning things every summer! Go figure.

PS If you have full size garlic bulbs to plant stick with the normal rule- ie pointy side up. Do it now if you have a chance because this gives garlic a chance to root in before the deep freeze. Garlic that is not rooted in and does not have a cool spell over winter is likely to rot in the soil rather than thrive. Spring bought garlic often flops as a crop.

Saturday, September 18, 2010

Fall Blooms at Reader Rock Garden


Thanks to Jack Wootliff, Donna Balzer fan, and attendee at the Reader Rock Garden members day. This City of Calgary Park is always open to the public but on Sunday September 12 members of the Friends of Reader Rock Garden were on hand to give little tours and answer questions. Jack sent along these lovely Echinacea purpurea photos he took in the garden. If the Echinacea are in bloom is it almost the end of summer? Lets hope it drags on a little longer

Thursday, September 16, 2010

Royal Botanic Garden opens Veggie Village!


I was lucky to be in Toronto last week when the Royal Botanical Garden opened its new exhibit. Veggie Village is a look at how and why people grow their own vegetables with excellent examples of various garden styles. One of the coolest things is the "photo signs" where gardeners/visitors are encouraged to take photos of signs describing how to use vegetables in their kitchen. Here is a photo of Pak Choy - also known as Bok Choy as well as a recipe for cooking Baby Bok Choy.

Bok Choy - like cabbage- is a vegetable suitable for fall growth so these plants will be left in the ground over the next month or more for visitors to view. There is no additional charge for visiting Veggie Village at RBG.

Tuesday, September 7, 2010

Check-Up on Local Permaculture


Last week I dropped by to check up on Verge Permaculture in Calgary. Michelle and Rob Avis are still trying to fix soil that is in its third year so it goes to show hard lifeless soil is not an easily remedied problem. Luckily one of the premises of permaculture is to hill beds so that the rain falls between beds and is absorbed up into the beds gradually. This was definitely working. The system also keeps people from walking on the soil and further compacting it.

Meanwhile Verge has a bumper crop of radish pods and a million other activities on the go. One of the projects involves building a solar greenhouse to increase the length of our extremely short growing season. I will keep an eye on the projects they pursue because it is interesting to all gardeners, not just permaculturists. Meanwhile Rob Avis has offered to preview my new veggie book. I am off to meet with co-author Steven Biggs to finalize and confirm the text this week. Yes the book series project is humming along and we hope to have the first in the series ready to show off in time for spring planting!

Monday, September 6, 2010

Molasses for Ant Control?

Well if this isn't a perennial problem in everyone's garden I don't know what is. Earlier an entire ornamental grass was picked up* and was in the process of being hauled away by ants when I put it out of it's misery by digging up and disposing of it myself.

I have tried cornmeal and borax and other "solutions" and my husband was threatening the big guns - aka pesticides - so I had to try something. That's when Joanna offered up her simple solution. She mixes molasses with water and pours that right on the ants. If this works it will be a miracle. Today is Sept. 6th and I have just poured two Gallons of water/molasses mix on the word's biggest ant hill inside my light standard at the front of my house.

Check back later to see what is happening. The theory is that the sugar in the molasses will be attractive to the ants - after they eat it they will literally die of a sugar overdose because sugar turns to alcohol and they can't tolerate alcohol. This is because insects don't have any way to break down alcohol.

*** Well the plant was not being taken away per se but the ants were slowly burying it as they were busy constructing their new nest inside it.

Sunday, September 5, 2010

Carrots in Soil-Less Mix seem to be Fly-less as well


It is finally harvest time in my mini-garden beside the house. Last week I reported on the grand harvest of 15 blue potatoes from a single pot and this week I started pulling carrots out of my 3' x 3' mini-garden.

Because this was just an experiment and not a big "carrot growing operation" I was surprised how clean the carrots came out and it was a minute before I noticed the roots were rust-fly free. Then I remembered Joan telling me the carrots she was testing in her pots beside the ones growing in the ground were also fly free while the ground-grown carrots were riddled with the tiny maggots (or worms) so common with this insect.

We all know carrots do better in light soils but is it possible you can grow rust-fly free carrots more than one year in the same soil mix? I will definitely leave the soil in tact in this wooden box just to trial this idea next year. This is a nagging and irritating pest of carrots so it is great to know there may be a simple solution.

.